Monday, December 19, 2011

Lunch-staraunt week

I just threw together this persimmon carpaccio salad from Herbivoracious.  I feel ridiculously fancy, packing this in my lunch. No one has to know that it came together in under 10 minutes.

Also in my lunch are tom yum soup, rice crackers, chocolate, and clementines.

Monday, December 12, 2011

Excellent Spring Rolls

This week our friend J. is visiting, and it was her idea to make spring rolls.  Yesterday we had spring rolls for dinner, and then wrapped up all the extra vegetables to make lunch.  My lunch today is four very fat spring rolls with peanut sauce, cherries & almonds, a Korean pear, and cake.  These spring rolls are deliciously refreshing - they're basically salad in finger-food form.  We used a variety of veggies for filling:
  • Pan-fried tofu
  • Shaved carrots
  • Avocado
  • Pea sprouts
  • Basil
  • Cilantro
  • Salad greens
  • Green onions
I had to invent a peanut sauce recipe, because they often contain fish sauce which is incompatible with us being vegetarian.  Here's how I made mine:
  • Start with a lot of peanut butter.  Probably at least a third of a cup, maybe half.
  • Mix in orange juice until it's liquid enough, or perhaps just barely too thick (maybe 1/4 cup).
  • Add soy sauce for salt.
  • Add a tablespoon or so of chili garlic sauce.
  • Add about a teaspoon of honey.
  • Use a tablespoon or two of rice vinegar to adjust for acidity.

Monday, December 5, 2011

Festive Holiday Dinner Becomes Hearty Lunch

Yesterday F. and I rounded up a gaggle of friends and visited a local pick-your-own Christmas tree farm.  I chose this particular farm because it also featured cider donuts and a petting zoo.  Once the Tree Team had safely ensconced the tree in our living room and decorated it within an inch of its life, we ate a festive, somewhat rustic dinner: these chipotle-spiked mashed sweet potatoes (though I might have spiked them a little harder than the recipe called for); these stuffed mushrooms (with dried cherries added to the stuffing); these dijon-braised brussels sprouts, and a pomegranate-pear-blue cheese salad.  Our intrepid friend E. made a strenuous trek on public transportation while carrying a freshly-baked hazelnut raisin cake.  After a lovely and slightly overwhelming dinner, I taught everyone how to play "I Spy" properly. 

Now the leftovers from that dinner are finding a second life as my lunch for the first half of this week.  I'm looking forward to celebrating Christmas Tree Quest Day all over again at lunchtime.

Monday, November 28, 2011

Lunch... with Special Guest Star Soup

For my mom: a picture of celery root.  See how it looks like a brain?  It's usually smoother, greenish, and not as brainy on the other side.


 I'm using up the last of the celeriac-potato soup today.  This lunch also has pomegranate-apple-goat cheese salad, clementines, crackers, and chocolate.


This will be a week of soup for lunch: we made potato-broccoli-cheese soup yesterday to pack once the celery root one is used up.  Here's how it goes:
  • Peel & cut up 2-3 potatoes.  Start cooking them in some boiling water.
  • Cut up 2 heads of broccoli, and add them to the boiling potato water after about 10 minutes.  Let everything cook for about 10 more minutes - that's 20 for the potatoes and 10 for the broccoli.
  • Drain the vegetables (if you don't have veggie broth, keep the water) and mash them with a potato masher.
  • Chop an onion and cook it in a couple of tablespoons of butter.
  • When the onion is at the transparent stage, add a couple of tablespoons of flour to the onions and butter to make a roux.  Cook it around until the flour smells & tastes cooked.
  • Slowly add a cup or two of veggie broth or your reserved broccoli water.  If you are using broccoli water, add a little salt too.
  • Add about a quart of milk.
  • Use an immersion blender to blend everything some more while the liquid is still fairly cool.
  • When the soup starts to steam, slowly stir in about 1/3 pound of grated cheddar cheese a handful at a time.  Consider also adding some grated parmesan cheese - it really adds to the cheesy taste.
  • Done!  Pack the soup up into 1-2 cup containers -- we got about 8 servings.

Wednesday, November 23, 2011

Frankenlunch

Lunch this week is a little bit unusual, because I cooked two delicious things that don't really go together.  On one hand, we're finishing up the tamales with Roman's chile sauce.  But I also made this French-style celery root soup.  So I've been packing celeriac soup, carrot sticks & hummus, tamales & chile sauce, and an apple.  The carrots and hummus are not pictured because I ran out of those and didn't want to buy more just when we're about to be off work for the holiday and have no need for packed lunches.

Wednesday, November 16, 2011

Excellent Tamales

Lunch this week is the result of an ambitious collaborative cooking party we had this weekend.  I invited a bunch of folks over and we made tamales as a team.  Tamales are great to make with company, because the assembly is a little tedious and then you have to wait for two hours while they steam.  In the mean time you can chat, have a drink, watch a movie... and bam!  Tamales!

The tamale recipe we made is based on this one, with a few modifications due to vegetarianism.  The process is:
  1. Soak your corn husks in hot water for an hour or two.  You can put them in the hot water before you start making the dough & filling, and then  they'll be nice and softened when you're ready to use them.
  2. Mix 2 pounds of instant masa dough with ground cumin, ground chiles, paprika, garlic powder, and salt
  3. Mix in 2 cups of vegetable oil
  4. Add ~2 quarts of warm veggie broth (I just used the "Better than Boullion" instant stuff and warm water)
  5. Make your fillings.  We used cheese, roasted poblano peppers, roasted sweet potatoes with spices, regular old refried beans from a can, and tofu with Roman's Awesome Chili Sauce, which I will describe later.
  6. To roll a tamale:
    1. Lay a corn husk in your hand or on a cutting board with the flat, cut end closest to you.
    2. Look at the steamer you will cook the tamales in.  They have to stand up on end in the steamer, so the depth of the steamer pot is the absolute longest you are allowed to make tamales.  I'll tell you later how I cheated on this, but try to keep the length close to Spread masa dough on the corn husk, about 1/4 inch thick (depending on how fat you want your tamale to be), 2/3 across the width of the husk, and as far down the husk as you have room for in your steamer.  Cover the corn husk all the way up to one side edge, and leave the other edge empty.
    3. Spoon a couple of tablespoons of your chosen filling(s) on top of the masa dough, roughly in a line.
    4. Roll up the corn husk, starting from the side that you covered with masa.  The empty edge will continue to wrap around the tamale tube.  
    5. Fold the empty bottom of the corn husk up. 
    6. Done!  Stand it on end in your steamer pot, open side up.
  7. Cover the tamale-packed steamer pots with their lids.  If the tamales are too tall, use aluminum foil to cover them (tightly).  
  8. Steam them for 2 hours.  Check periodically to make sure they haven't boiled dry.
We ate these with a variety of accompaniments, including veggie chili and Roman's Awesome Chili Sauce.  By now you must be wondering how to make that sauce.
  1. Simmer some dried ancho and/or california chiles in water for like 20 minutes until they're soft and rehydrated.
  2. Strain them, and remove the stems and seeds.
  3. Puree the peppers.
  4. Heat some oil in a frying pan, and fry the puree in the oil.  Consider adding some salt or lemon juice (we didn't think it needed either).
Put this sauce on everything.  Cubed/mashed tofu makes a great taco and tamale filling when topped with this sauce.  The sauce is also good on tamales or when eaten with chips.  I bet it would be good on enchiladas.  You could use it as a base for chili.  Just imagine!

Monday, October 31, 2011

Excellent Rice Ball Workflow

I think I've done an especially good job on my lunch today.  I'm using up leftovers efficiently, packing a variety of things, and making sure everything tastes fresh at lunch time.  Here's what is in there:
  1. Miso soup -- the last ladlefuls of the miso soup I made for lunch yesterday got packed into our lunches for today.
  2. Seth's green beans with miso and cucumber salad/pickle -- I'm getting very near the end of those party leftovers.  That's good because I can't imagine they will stay good forever, but also bad because they are perfect lunch side dishes.
  3. Rice balls!  I had been waffling about the best way to put rice balls in a lunch, since the rice quickly loses its awesome texture if refrigerated.  My solution is to make the fillings in advance, run the rice cooker while I'm in the shower, and make the rice balls fresh the morning I pack them.  They didn't take long at all, especially since all the other lunch components were done in advance (no apple or carrot slicing).  I marked the rice balls to make sure that we each got one of each flavor: ume-shiso (1), negi-miso (2), and seaweed (3).
  4. Roasted nori squares -- I like to wrap rice balls in nori, but I was concerned that it might get soggy if I wrapped them right away.  This way, the nori will be crispy and fresh and can be eaten on the side.
  5. Lemon cookies -- the last three!  I really enjoy clearing things out of the pantry.

Monday, October 24, 2011

Excellent Bento

Our friend S.'s birthday was this weekend, so F. and I threw a party at our house.  S. likes Hayao Miyazaki's movies, so we showed a couple of them and made some Japanese-style food: rice balls, various vegetable sides, and taiyaki.  Today I've got an assortment of the party leftovers in my lunch.
This lunchbox has shiso tofu, green beans in miso-based dressing, gobo (burdock root) in sesame dressing, spinach, cucumber salad, broiled shiitake mushrooms, and rice (under the mushrooms).  I also packed an apple but it's not in the picture.
I have to admit that I didn't help with a lot of this cooking.  I'd just been at jiujitsu practice, so I took a shower and a nap, and when I woke up F. and S. had done everything already.  I did make a lot of rice balls (ume-shiso, miso eggplant, seaweed, and avocado), but those were all eaten at the party so I've got none to pack in bloggable lunches.  I should report, however, that rice balls were quite good when filled with this miso-roasted eggplant.  I think the eggplant would also be nice on its own, or over rice in non-ball form.
I've been thinking that I like rice balls quite a lot, but they're not really the same after they've been refrigerated.  Instead, I might consider keeping appropriate rice ball fillings on hand, starting some rice in the rice cooker while I'm in the shower, and packing fresh rice balls in the morning instead of the night before.  They're about as quick to make as a sandwich, and so much tastier.

Monday, October 10, 2011

Lunch This Week: Sweet Potato Mole Chili

I spoke with my brother today about what to have for Thanksgiving dinner, and he brought up a sweet potato chili I made a few years ago. I have no idea what recipe I used to make that one, but the discussion put me in the mood for chili again. I wound up adapting this Epicurious recipe to use sweet potatoes and cauliflower instead of zucchini and sqaush. I estimate that I must have made a double batch, because I wanted there to be enough for us to eat the rest of the week. The bottom shelf of the fridge is now 100% full of small tupperware dishes full of chili.


Good thing it was delicious, because we're stuck with it for a while.

Friday, October 7, 2011

Here's what happens when I run out of pre-made leftovers

Today, I hadn't brought any pav bhaji up from the downstairs freezer, I had forgotten to make rotli last night, and there was only about half a serving of leftover soup.  Sometimes this happens.  I just made a lunch out of all the standby side dishes, instead of only packing one or two. 


F. and I each get arugula salad with fresh mozzarella, apples & peanut butter, and carrots & hummus. If I'd been thinking, I'd have thrown some chocolate in there too, but I forgot. It's a light lunch, but we had pizza and drinks for dinner yesterday so I'm not going to be starving.

Thursday, October 6, 2011

A Lunch Brainteaser

F. has decided that he would like to eat tacos next week.  And he wants the crunchy shells.  How on earth are we going to pack those for lunch?  I have some ideas but none of them are particularly promising.
  • Pack the shells & fillings separately.  Downsides: requires assembly at lunchtime, shells might get broken on the way to work, unless I put them in a tupperware, which would not be very space-efficient because taco shells are mostly empty space until you fill them with stuff.
  • Pre-fill the tacos.  Downside: shells will get un-crunchy, similar freshness drawbacks to a sandwich.
  • Make taco salad.  Downside: not strictly tacos.
  • Eat tacos for dinner and pack something else for lunch (soup, more frozen Gujarati leftovers).  Downside: we are not home very often for dinner and might not eat all the taco fixins that way, getting tired of rotli and shaak, rotli and shaak are not tacos.
My lunch today is pav bhaji (frozen pre-leftovers), a 1-qt tupperware full of arugula with a little bottle of sesame-ginger dressing, and apples & peanut butter.  

Tuesday, October 4, 2011

Excellent Salad

I mentioned a while ago that I like to pack non-leafy salads so that I can be sure that they don't wilt, but these days I've come up with another way of doing it.  I actually do pack a lettuce-based salad, but then I use these cute little sauce-storage piggies to hold the dressing so the lettuce doesn't wilt.

It turns out that buying one of those big plastic boxes of pre-washed baby lettuce mix once a week is much faster than chopping a bunch of jicama.  I will probably still pack "chunky salads" pretty frequently but it's nice to have a workable option for lettuce-based salads.  Honestly, if you have a tasty salad dressing, two big handfuls of lettuce in a tupperware with a couple of those sauce piggies is all it takes.  It's not like the salad really needs any toppings, since it's not the only thing in the lunchbox.  Leaves can be delicious on their own.  With dressing, of course.  I'm not crazy.

Friday, September 30, 2011

Excellent Lunch at Home: Put an Egg on Top

Since I became vegetarian, I've stumbled upon a little-known secret of cooking: nearly everything is better with a fried egg on top. Even non-vegetarian foods are better with an egg. Consider: potatoes, rice (bi bim bap), hamburgers (this is big in Australia), sauteed greens of all kinds, salads, roasted veggies. If you allow the egg to be cooked by any appropriate method, instead of just fried, the list expands further to include stir-fries, desserts (hello custard), tacos, and even more. I am a great advocate of putting eggs on top of other things.

In honor of eggs, and because I went on a business trip in the first half of this week and I've got the day off, I'm posting a lunch with an egg on top today. I made garlic-lemon quinoa with spinach and a fried egg.

The quinoa was languishing in my pantry, since F. nearly always defaults to basmati rice. The spinach had been bought last weekend in anticipation of making a lot of salad, but then I wasn't here to eat any salads. It needed to be used up. As far as eggs and garlic... if I didn't have eggs and garlic in my kitchen it would be because I didn't have a kitchen.

  1. Throw some quinoa in the rice cooker.  Remember salt.
  2. Sautee some spinach in butter or olive oil with chopped garlic.  
  3. Mix the spinach and cooked quinoa together, spoon some into a bowl, and squeeze a slice of lemon on top.
  4. Fry an egg in the spinach-garlic pan and put that on top of the whole thing.

Friday, September 23, 2011

Excellent Mother in Law

I haven't posted as many lunches this month because F's mom and dad came to visit us a few weeks ago. It's F's mom's hobby to fill up our freezer with her cooking. We've got frozen samosas, several kinds of shaak (the general category of Gujarati cooked vegetables), pav bhaji, a lot of snacks, and a lot of raw ingredients. All in the freezer. Today was the first time this month that we visited the grocery store. So most of my lunches have been like this:

To be fair, I don't get to bring a lovely steel thali like that to the office. If only.

Excellent Blurry Lunch

F. has the wild idea to throw a party at which everyone can fry anything their heart desires: avocados, chocolate bars, hot peppers, buffalo tofu wings... anything.  That is Fry Fest, and it has not happened yet.  But we did get together with a few people to fry some things for dinner, and I did go to the grocery store that evening and buy everything that seemed like a good idea, even if it wasn't.

I had a few bell peppers and tomatillos lying around on Wednesday after a little bit too much exuberance at the grocery store in preparation for "Fry Fest: the Prequel."  I don't even really enjoy bell peppers most of the time, so I was at a loss regarding what should be done with them.  That's how they lasted until Wednesday.  But then I thought, "OK.  I don't like bell peppers, except when they are roasted until burnt and/or spiced with lots of cumin and garlic.  Let's go with that."  I broiled the peppers and tomatillos until their skins were substantially blackened, chopped half an onion and some garlic, and went to the basement to get my secret stash of cumin in the Big Jar so I could refill my common-knowledge stash of cumin in the Small Jar. 


I ate this roasted pepper soup with cheese & crackers, spinach salad with mustard vinaigrette, dried cherries & almonds, and my favorite weird green Naked Juice smoothie.  

Here's how it's done.

3-4 bell peppers
about 6 tomatillos
half a large onion
4 cloves of garlic
a teaspoon of cumin seeds
butter
4ish cups veggie broth
yogurt

  1. Halve the peppers and tomatillos, lay them cut sides down on a baking sheet or broiling pan, and broil them until their skins are blackened enough for you.  I went for about 15 minutes. 
  2. Chop the onion and garlic.
  3. Melt the butter in a big soup pan, and throw the cumin seeds in there.  You could add a chopped jalapeno here too if you like.  Or a chipotle!  That would be great.
  4. When the cumin seeds are sizzling, add the onion and garlic.  Cook them until they're cooked.  You know how long to cook onions and garlic.
  5. Add all the stuff from the broiler.  Maybe give it a few chops with a knife first, because you're going to use an immersion blender on it and that'll make it go faster.
  6. Add the veggie broth.  You could just add enough to allow blending and keep the rest aside, if you would like to control the thickness of the soup.
  7. Will it blend?  Blend it.
  8. Stir in some yogurt until the soup is creamy enough for you.  Check for salt.  It might be good to add ground chile powder here, especially if you have ground dried chipotles or something smoky like that.

Monday, September 12, 2011

Principles of Lunch: Reduced Fat Foods are a Waste of Time

I have already discussed why I can't stand packing sandwiches in my lunch.  My rationale was mostly a matter of taste; sandwiches suffer from refrigerator storage more than most other lunch-appropriate foods.  Now I have to confess my other dark secret: I also despise "low fat" and "low sugar" foods, including yogurt cups.  Blasphemy!  Yogurt cups, that other lunchtime staple, accused of treason!

I'm not saying I don't like how yogurt tastes.  Yogurt is delicious, and even most low-fat and low-sugar yogurts taste pretty good.  I just think they're treacherous.  They're not filling.  Worse, they taste like something that is filling, which makes it even more disappointing not to be full after eating them.  Then you eat more of them, or of something else, and the whole intent of having your snack is thwarted.

I am also suspicious that tricking your body like this isn't healthy in the long run.  It probably trains you to eat fewer fruits and vegetables, for one.  Expecting calories when there are none to be had probably just makes your body hungrier, too.  Why not just have a little bit of the real thing, and actually be satisfied? 


So I scour the supermarket for full-fat yogurt cups and "whole milk" plain yogurt.  (Trader Joe's has some tasty greek yogurt cups, FYI.)  I drink whole milk too, and I cook with butter.  I don't drink soda often, but when I do it's the sugary kind.  When I eat dessert, I choose the richest and most satisfying one (I've got a soft spot for custards).  I look at it as the culinary equivalent of "quality over quantity."

Thursday, September 8, 2011

Excellent Lunch Away From Home


My job sent me on a trip last week.  I was doing some testing out in the middle of nowhere, and it would have been a half-hour drive to get to anyplace that would sell me food.  I'm not kidding!  It was empty out there.  So I packed a lunch, and I thought this would be a good chance to talk about how to pack a lunch when you don't have a kitchen.

My method isn't terribly complicated.  I just buy whatever is at the grocery store that doesn't require any cooking or slicing.  

  • Baby carrots and hummus
  • Crackers and cheese
  • I make an exception to the slicing rule for apples and peanut butter
  • Yogurt cups -- I've got a grudge against low-fat yogurt, though, so I always have to hunt for the non-diet kind.  Trader Joe's Greek yogurt cups are often better for that.
  • Bananas and other fruit
  • Nuts! Or trail mix.
  • If I weren't vegetarian I'd list cured meat here too, like beef jerky and Slim Jims.
 When I got back, my in-laws were visiting and I helped my mother-in-law fill the freezer with a giant stockpile of Gujarati food.  I expect that for the next few weeks I'll be packing samosas, pav bhaji, and rotli-shaak.  I do want to have a tamale-making party some afternoon, though.

Thursday, August 25, 2011

Excellent Lunch Psychology

It's easy to let small barriers stop you from packing lunch every day.  Maybe your lunchbox is dirty, you're out of peanut butter, or you can't find the cutting board to slice your apples on.  Maybe you overslept.  The key to a sustainable lunch-packing habit is keeping this kind of barrier low and providing little incentives to yourself.  If you have to drag yourself through a lot of extra work to pack lunch, you will find yourself buying sandwiches in the cafeteria a lot.  Willpower is like a muscle that can get tired if it's overworked, so the trick is to create easy, automatic habits.  Here are some of the tricks I use to lower the mental effort I have to put into packing lunch.
  • I decide what to pack in advance (even which sides and snacks to throw in) so that I don't have to think about it in the morning when I'm groggy and stumbling around.  I'm not terribly intelligent before breakfast, so it's a lot easier if I can pack lunch on autopilot.
  • I keep a couple of differently-sized lunchboxes around and an ample supply of tupperware in various shapes and sizes, so I never have to fuss around figuring out what to put the food in.
  • I keep nuts and dried fruit in the pantry.  If I run out of fresh snacks like apples and carrots, I can always throw in a baggie of those to go with my lunch.
But even so, packing lunch isn't trivial.  It takes some work, and I tend to get cranky if I perceive an activity as all work and no play.  That's where rewards and incentives come in.
  • I always pack dessert.  
  • I have a cool lunchbox that I enjoy using.  Actually... I collect them.
  • I've also got a brightly-colored insulated lunch bag for tupperware days.
  • I make sure lunch is delicious, so it's worth the extra effort.
  • And I pack a BIG, satisfying lunch.  Because it's not worth it if I do all that work and then I get hungry before I get home from the office. 

Tuesday, August 23, 2011

Excellent Lunch this week: Pav Bhaji

The best way to describe pav bhaji is "Indian-spicy vegetarian sloppy joes."  It's not eaten in sandwich form, though -- instead the mashed vegetables are scooped up with toasted pieces of bread. 

We make a ton of pav bhaji at a time and then freeze it in smaller containers.  It's just as good after defrosting, since it's basically stew.  Here's how it's done:
  1. Steam all these vegetables until they're mushy enough to mash with a potato masher:
    3-4 potatoes, peeled & chunked
    1 eggplant, peeled & chunked
    1 cauliflower, chunked
    4 large carrots, chunked
    3 green peppers, chunked
  2. In your largest pot, heat about 2 teaspoons each of mustard seeds and cumin seeds in about a stick of melted butter until they start to sizzle and pop.
  3. Add a chopped onion and 5ish cloves of garlic.
  4. When they're translucent, add 2-3 chopped tomatoes.
  5. Mash all the other vegetables that you've steamed, and add them to the butter with the onions and tomatoes.  If you don't have a bowl big enough to mash them in, you can add them to the pot and then mash them.  An immersion blender also works for this.
  6. Add a whole package of pav bhaji masala.  If you don't like spicy food, you can add the masala a little at a time until you get the spice level right.
  7. Add salt to taste, more butter if you like, and ground chiles & black pepper to get the heat where you like it.  Add a little lemon juice here or save it for serving time, either way.
  8. Serve with buttered toasted buns, chopped raw onions, cilantro, and lemon wedges.
I should note that these vegetables and quantities are pretty rough.  If you've got extra carrots or not enough green peppers, don't fret.   You can add pav bhaji masala to a wide variety of vegetables with excellent results.  Once it's all mashed, no one will be able to tell you added a turnip.

Tuesday, August 16, 2011

Onigiri Update

Yesterday, we had a little extra time in the evening so my man F. suggested that he help me make more onigiri.  He must have really liked them -- he's usually not so enthusiastic about cooking experiments, and rarely wants to help with them.  (He makes food often, he just doesn't do it recreationally.)  So they must have been really good! 

I'm having more for lunch today.  We added a third flavor: avocado.

Sunday, August 14, 2011

KC's Excellent Onigiri Adventure

Inspired by Just Bento and the ume-shiso roll at Genki Ya, I decided to experiment with making onigiri this week. My friend M. helpfully shared this instructional video from cookingwithdog, too.  That was especially useful, because I also have a dog and I pay a lot more attention to videos if there's a dog.  Armed with no shortage of resources, I assembled all the ingredients and enlisted my long-suffering husband F. to take some photos.


These are the fillings. I used ume-shiso (pickled plum and shiso leaf) and negi-miso (green onion mixed into miso paste). I'm still not sure about umeboshi on their own, but I definitely like them with shiso leaves.

Down to Business

Start by wetting your (clean!!) hands in some salt water.

Put some rice into the palm of one hand and make a small divot for the filling.

Add about a teaspoon of filling. This one is an ume-shiso onigiri.

Add a bit more rice on top to close it off, then use your hands to shape it.

The triangle shape is not mandatory; I made ume-shiso onigiri triangle-shaped and negi-miso were barrel-shaped.

Lovely!

Wrap a little nori around it. Nori tastes good and makes it look pretty. I bet it also has vitamins or something.  It sticks best if the rice is still a little warm when you wrap it.

My first two onigiri. The barrel one was a little too big, I think. I made them smaller after that.

That's F's hand, hovering over the plate until the picture has been taken so he can eat one.

I wrapped these tightly in plastic wrap while they were still warm and put them in the fridge. Rice tends to get a little weird in the fridge because it dries out, but the plastic wrap should help.

Thursday, August 11, 2011

Hi it's Vince

Stop having boring lunches.  Stop having a boring life.


Excellent Lunch Logistics: How to Fit Packing Lunch Every Day into Your Schedule

I pack lunch every morning before work, and I am not a very disciplined person.  This would be a recipe for disaster (and for frequent trips to the disappointing salad bar at the office cafeteria) if I didn't make it easy on myself.  I have some tricks that make packing lunch less of a pain in the ass:
  • Cook a load of pre-leftovers on Sunday afternoon that can be eaten for lunch the rest of the week.  Freeze some so they don't go bad on Thursday.
  • Know everything that's going in the lunch before you start packing (perhaps the night before or even the weekend before) -- groggy predawn indecision is the enemy of a well-packed lunch.
  • Never run out of possible side dishes.  Have backups in the pantry.
  • Do the dishes when you get home from work so your lunchbox/tupperware is clean.
  • In case of dishwashing failure or laziness, be sure to have extra tupperware and/or lunch boxes.
  • Consider also having backup main dishes in case you don't cook enough lunch on Sunday.  We keep frozen samosas around most of the time, but soon we'll transition to tamales.
In the end, it all comes down to having a backup for every step of the lunch-packing process (even your brain).  Otherwise a single glitch could derail all your delicious plans and leave you lunchless.  

Monday, August 8, 2011

How to Pack an Excellent Lunch: The Elements of Style

I Hate Sandwiches


Actually, I only hate sandwiches when they've been sitting around for several hours, like the sandwich in a packed lunch has.  Sandwiches for vegetarians are especially susceptible to the problems that beset a sandwich when it's been sitting around.  The cheese gets slimy from being next to the lettuce and tomato, the lettuce wilts, the tomatoes' texture gets strange, the bread absorbs too much moisture from the vegetable fillings.  And really, bread and cheese are quite dry and hard to eat together unless they're freshly toasted.  Who's got a toaster oven in the office?  Not me.  Honestly, I'd rather eat all the parts of a sandwich individually than suffer through a sandwich that was assembled the night before.  A bit of salad or grilled vegetables with bread and cheese on the side works.  Sandwiches just don't. That rules out what's probably the number one lunch in the US. 


A Dazzling Array of Side Dishes

I cook lunch for the whole week all at once, on Sundays.  I'm not home much in the evenings, and that allows me to have delicious lunches without becoming an insomniac.  It also means I eat the same thing for lunch every day most weeks, which is why side dishes are crucial.  I keep around a few "staple" snacks, and lunch isn't complete without at least one of them.  I'm more likely to enjoy the main dish I pack if it's not the only thing in my lunch.  Monotony ruins a lunch, ad variety elevates it.  Here are some of the snacks I like:
  • apples with peanut butter
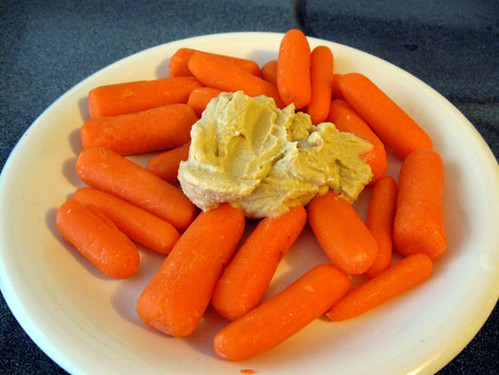
  • carrots or other vegetables with hummus
  • nuts
  • dried cherries (usually with nuts)
  • berries, with or without yogurt
  • salads (especially non-leafy salads, which don't wilt as quickly)

    Sauce for Everything


    Sauce is a crucial ally in my anti-monotony crusade.  Sure, samosas taste pretty good on their own, but they're better with chutney.  They're even better if you have tamarind chutney and green chutney.  Apples are similarly great on their own, but with peanut butter they're more filling and they contribute a sweet-savory combination taste to the meal instead of just being fruit.  Carrots go with hummus; they're boring on their own.  When I make Big Gujarati Lunch, of course I include pickles and pureed mango sauce too.  Sauces and garnishes keep food interesting and remind us that even poor, maligned, packed-from-home, eaten-quickly lunch deserves to be delicious.


    Always Pack Dessert

    Lunch deserves to be delicious.  We deserve to enjoy our lunches, not just to refuel so we can make it to dinner time.  Dessert is there to remind us of that.  It doesn't have to be a lot -- often I just pack a couple of ounces of dark chocolate.  It just has to be present.  The way I like to pack lunch turns it into a true meal, and a meal is more satisfying when there are a variety of dishes and a dessert.


    Can I Microwave This?  Can This Keep in the Fridge? 

    I've made a big deal of variety, but this last point limits the variety of foods that work well in a packed lunch.  Food I pack has to be good cold, or I have to be able to reheat it in the microwave.  It also has to survive overnight (or even a day or two) in the fridge.  I don't pack things that have to be reheated in the oven or toaster.  I never dress leafy salads beforehand -- I use tiny salad dressing containers to take dressing along separately.  Basically, I think lunch should taste good when you eat it, not make you wistful for what it must have tasted like when it was freshly cooked. 

    Sunday, August 7, 2011

    Excellent Lunch 2: Cold Soba Noodles

    Yesterday F. and I stopped by Reliable Market to pick up some groceries, but we'd just been at jiujitsu practice so we were tired, hungry, and impulsive.  At the store they were giving out samples of kimbap and cold soba noodles, both of which were delicious.  We took some kimbap home to eat for lunch right away, and bought some soba noodles, which we cooked up this afternoon.  The bottled soba sauce they had wasn't vegetarian, so we made some of our own.  The noodles were great with the sauce, ground radish, green onions, tofu, wasabi, and shredded nori.

    Directions:
    1. The dipping sauce I used is called tsukejiru. Here's the recipe I used, modified from The Japanese Kitchen: 6 tablespoons of soy sauce, 2 teaspoons tamari, 1 tablespoon sugar, 3 cups of mild veggie broth, and a chunk of dried kelp.  I put the kelp in there because the original recipe uses fish broth, and the kelp helps replace the ocean-y taste but is still vegetarian.  Let the sauce cool.
    2. In a food processor, grind a daikon radish or one of those big Korean non-daikon radishes, depending on how strong you like your radish taste.
    3. Slice some green onions.
    4. Slice some nori into pretty shreds for garnishing.
    5. Cut some fresh tofu into cubes.
    6. Cook some soba noodles.  Run them under cold water immediately after they're done so they don't overcook.
    7. I think the "official" way to eat this is to add wasabi, ground radish, green onions, and nori to a small bowl of dipping sauce and then dip the noodles in, but I couldn't find a logistical way to include the tofu cubes I wanted in there.  Instead, I topped the noodles with all the garnishes and tofu cubes, then poured a little sauce into the plate.

    Excellent Lunch 1: Bi Bim Bap

    Lunch packed for tomorrow: brown rice bi bim bap with carrots, broccoli, bean sprouts, enoki mushrooms, baby bok choy, shitake mushrooms, and fried tofu.

    Directions:
    1. Cook some rice.  I have a rice cooker, so that's all there is to this step.
    2. Choose 4-6 kinds of vegetables, and slice them thinly or cut them into suitably small pieces.  
    3. For each vegetable, you have two choices.  EITHER: blanch them in some boiling water, then toss them in a little sesame oil and salt, OR pan-fry them in some sesame oil.  This choice really depends on the vegetable.  I blanched the baby bok choy and carrots, but stir-fried the mushrooms.
    4. If you like, fry some tofu.  Or cook some meat, if you swing that way.
    5. For each serving, first scoop a good amount of cooked rice into the bowl.  Top with about 1/4 cup of each kind of the various vegetables.  It looks nice if you keep each vegetable in its own zone, like in the picture.  
    6. Put the tofu in the middle.
    7. Put a just-barely-fried egg.  You want it extra runny, because if you're packing this in your lunch you'll probably have to microwave it, and that will cook the egg a little extra.
    8. Squeeze on some bi bim bap sauce (gochujang, which you can get at your local korean grocery).

    Tuesday, June 14, 2011

    Excellent Lunchtime at home

    I'm working from home today because my officemate gave me his cold.  Yuck.  To console myself, I used up the last of the dosa batter to make an uttapam for lunch.  With chai and sambar, because I don't do things halfway.